Check out this fun video I made to show you how to use the designs in my Slappliqué Flower Collection!
Also, should you download any of these Slappliqué flower designs, here are the instructions that are included in that purchase. This will give you a better understanding of the initial set-up as well as fabric requirements:
Slappliqué Flower
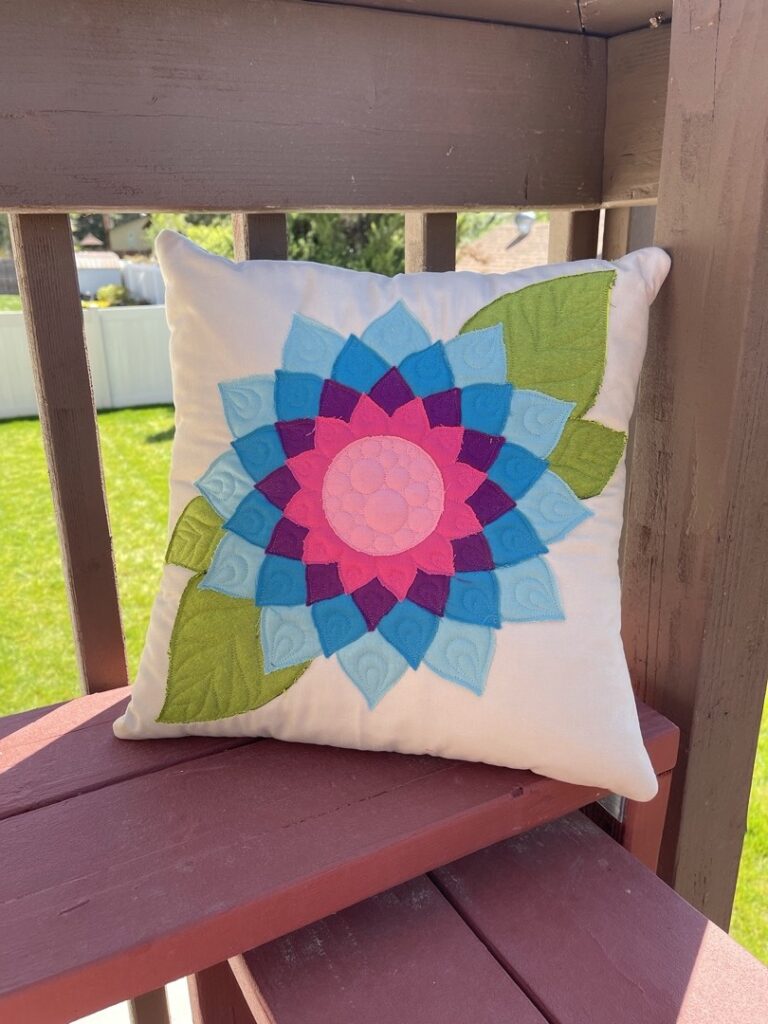
Thank you so much for purchasing my Slapplique Flower design! The tutorial video above is designated for a 16” finished size, and even includes all the instructions to make it into a cute throw pillow!
When selecting thread: you have a few different options. You can use an invisible thread that will blend with all your fabric colors, or you can take the time to change your thread color between each piece of fabric- to match that piece of fabric. I personally prefer using invisible thread and Sulky Invisible thread is my favorite. It could also be fun to use a metallic thread to add a little sparkle, or even use all black thread which will give the design an “outlined” look.
When selecting batting: you’ll notice in the tutorial video that I used two layers of Warm & Natural batting from Warm Company. I used two layers of batting because I knew that these were going to be made into throw pillow covers, and I wanted them to be fairly stiff and durable. If you’re planning to use this design for a pillow cover, I would recommend doing the same, but it’s ultimately your own choice. If you are using this design on a functional quilt, then you can simply do this on top of any quilt top and batting combination that you’d do for any other quilt. On a functional quilt, you’ll be able to see all the stitching, so I would recommend using a quilt backing fabric that is soft and maybe even a little fluffy, so that the bobbin thread isn’t too overbearing on the back of the quilt. Minky is always a wonderful choice, or even fleece would be nice as well.
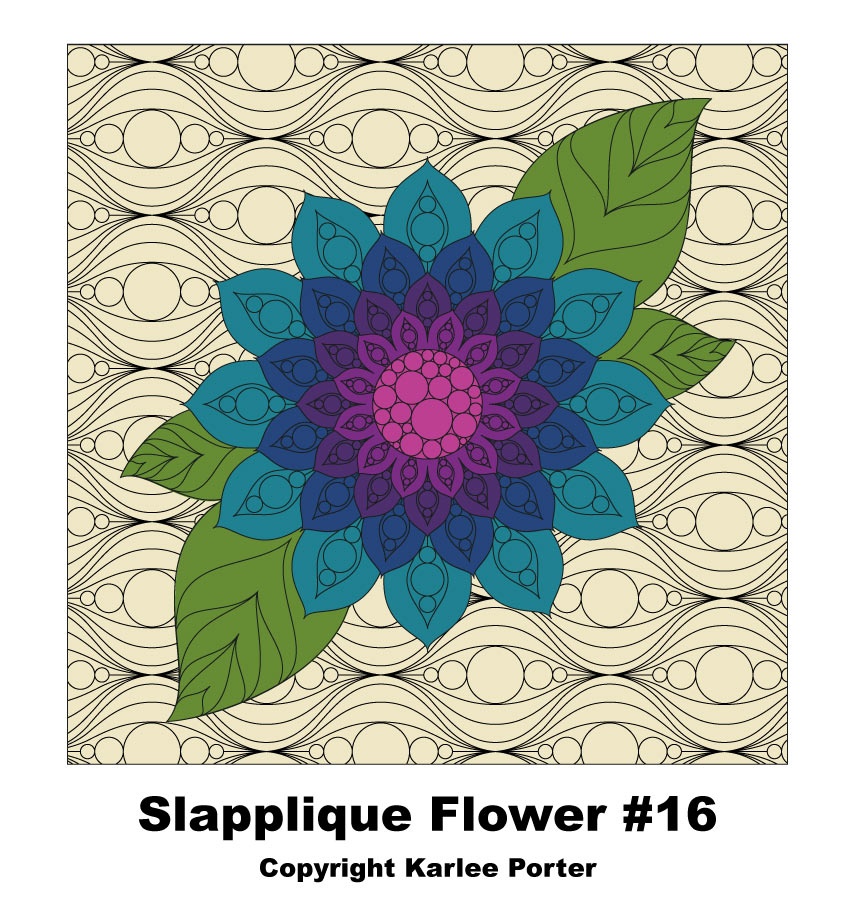
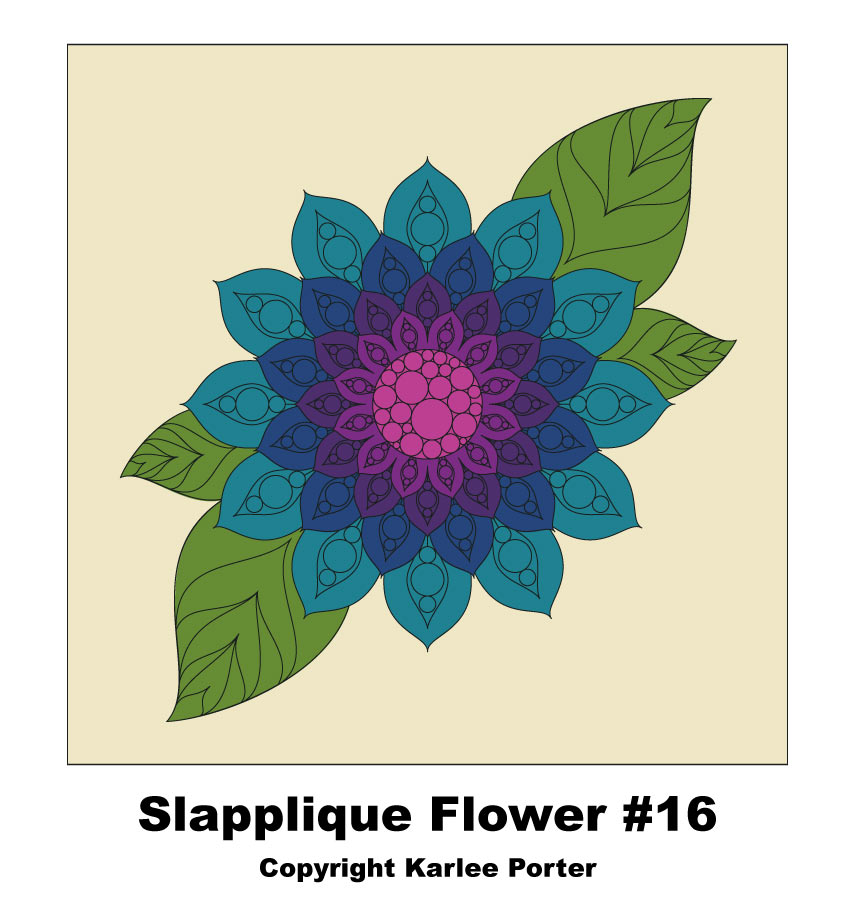
When deciding on a background behind the flower design: I opted for not doing any sort of quilting motif. But, this doesn’t mean that you can’t. One thing that would be really cool with these Slapplique designs is if you were to choose an edge to edge filler type design and stitch that out in the entire background on your fabric, and then do the Slapplique over the top. While a background fill is not included in the Slapplique design file, it would look nice to add one. It would look something like this:
With a background fill:
Without a background fill:
When you’re quilting this design: you can use this chart below for all the fabric requirements and sizes that you’ll need should you decide to scale the design up or down. These measurements are approximate, as each of the Slapplique Flower designs within the collection vary in size just slightly. These fabric requirements should for sure be enough fabric for each of the sections in the design, because it is always better to have a little extra than not enough!
| Finished Perimeter size: | 12” | 16” | 18” | 20” | 24” |
| Petal Layer #1 | 9” | 13” | 14” | 15” | 18” |
| Petal Layer #2 | 8” | 10” | 11” | 12” | 14” |
| Petal Layer #3 | 6” | 8” | 9” | 9.5” | 11” |
| Petal Layer #4 | 5” | 7” | 8” | 8.5” | 9” |
| Inner Pebble Circle | 4” | 5” | 6” | 6.5” | 7” |
| (2) Large Leaf | 4” x 5” | 6” x 7” | 7” x 8” | 7.5” x 8.5” | 8” x 9 |
| (2) Small Leaf | 3” x 2” | 5” x 4” | 5.5” x 4.5” | 6” x 5” | 6.5” x 5.5” |
| (2) Back Pillow Panels | 12.5” x 10” | 16.5” x 11” | 18.5” x 12” | 20.5” x 13” | 24.5” x 15” |
Here are the basic steps that you’ll take when stitching out any of the designs in the Slapplique flower collection:
1. Load your quilt top onto your quilting machine frame.
2. Load the design onto your quilting machine, and resize the entire design to your desired size.
3. Using the chart above, select each of your fabrics and cut them out in the designated sizes.
4. Start stitching out the design. The first thing that is set to stitch is the outer perimeter of the design.
5. Once the outer square has been stitched, lay down your first piece of fabric. The design is digitized to stitch out each of the designs in this order:
a. Top right large leaf
b. Top right small leaf
c. Bottom left large leaf
d. Bottom left small leaf
e. Petal Layer #1
f. Petal Layer #2
g. Petal Layer #3
h. Petal Layer #4
i. Inner Pebble Circle
6. After stitching out the 4 leaves, each of the petal layers consists of two parts: the outer shape of the flower, and then an inner circle. With some of the Slapplique flower designs, the inner circles are just simply circles, and with others, they also consist of a quilting element to fill in each flower petal.
7. Be sure with each petal layer to not only cut around the outer edge of the flower petal shape, but also cut out the fabric of the inner circle. This way, the center of the flower doesn’t accumulate too much weight because of so many layers of fabric. This will help your quilting machine because it won’t have to stitch through more than a couple layers of fabric at any given time.
8. The last element to stitch out is the inner circle that is filled with the pebble motif. Once this has been stitched and you’ve cut off the excess fabric around that circle, the design is complete!
This set of written instructions is as comprehensive as possible, but you’ll really want to take time to watch the tutorial for this design on KarleePorter.com to really fully understand how to effectively use the designs in this collection.
Thank you again for supporting my work, it really means a lot to me!
-Karlee Porter

2 thoughts on “Slappliqué Flower Pillow”
Years ago I used to do applique like this as was taught me by Linda Straw, google her and see her fabulous work
Great tutorial! Thanks Karlee 🙂